


Here's my happy place, the place I often retreat to after a long, hard day. I spent last week cleaning and organizing, so it's a very calming and enjoyable place now. I really work much better in an organized space.
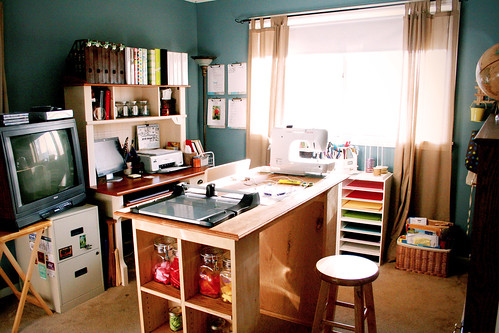
The studio serves as both an office and a craft space. The table in the middle was a birthday present from my wonderful husband who snuck over to my dad's house and MADE THIS! I was completely surprised! It still needs to be painted and stained (to match the computer desk). Jason made it high enough so I could stand as I work (which I often like to do). But when I'm tired, I can sit on the stool (another gift I received on Valentine's Day - my man really knows how to win me over!).
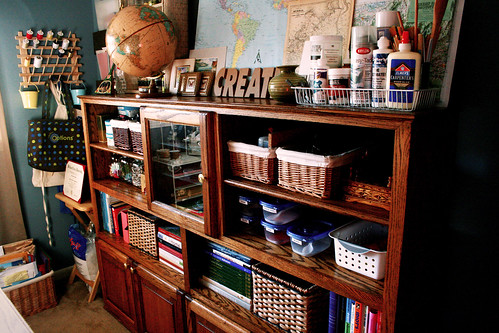
When I was in college I complained to my Dad that I was very tired of the cheap, plastic shelving that was sagging under my wealth of books. So, his response was to make me a cabinet out of oak. I am truly blessed to be surrounded by such giving and talented men! Since we have a piano in our dining room, this beauty became part of the craft room. And, yes, it is extremely difficult to move since it is so heavy. The glass cabinet in the center holds my panda collection. The baskets hold various crafting supplies. On top of this (which by the way has always been called the "mini-shrunk" since it resembles a shrunk my parents had) is my collection of various souvenirs and maps.
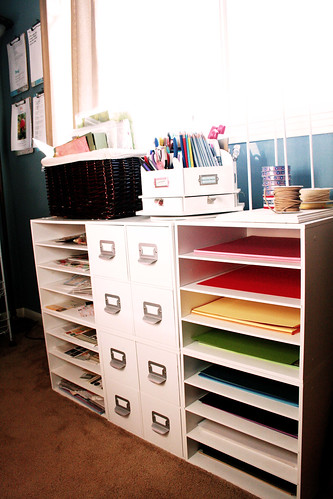
This is a set of six cubbies from Target that were a Christmas gift. I absolutely love this. For around $120 I got a great looking (and adaptable) storage unit. Right now I use one side to store my cardstock by color. The other side has embellishments sorted by themes (Christmas, birthday, baby, love, etc.). I need to get some trays or plastic containers for it, though. The center cubes hold various supplies. Three of the drawers are dedicated to my three favorite brands (American Crafts, Making Memories, and Heidi Swapp). I like to keep those alphabet stickers and embellishments separate since I use them often. Another drawer houses all of my letter stickers. The remaining four drawers house my wooden and foam stamps.
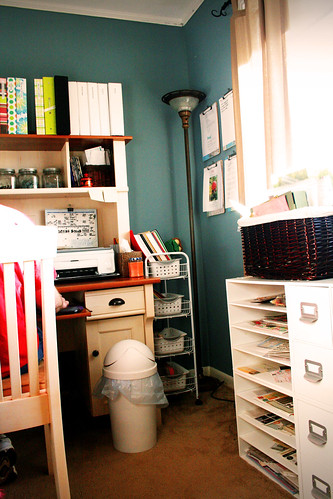
Here's the corner of the office by the computer desk. (No that's not where I normally store my trash can. I was just lazy and didn't bother to put it back for the picture.) The white metal rolling cart holds inexpensive white tubs from Target. Inside the tubs are cardstock and patterned paper scraps. I have cardstock in 8.5x11, 8x8, and 4x6. I cut my patterened paper and cardstock scraps down to 4.5x5.5 which is the perfect size for the front of a standard sized card. This really has helped me cut down on the amount of scraps that pile up and never get used.
Also, you can see that I have clipboards hanging on the wall. I'll explain those in more detail next.
Also, you can see that I have clipboards hanging on the wall. I'll explain those in more detail next.
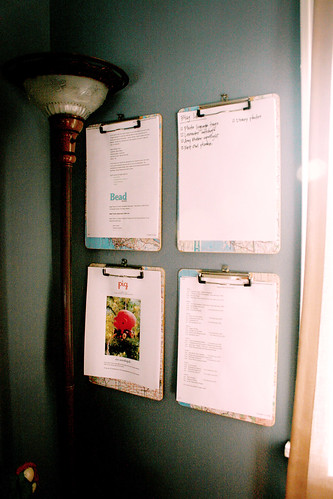
I really love to be organized. I have so many ideas, schedules, and lists running through my head that needed to be organized. But, I'm also a very visual person and preferred to have things out in the open so I can remember them. This is the perfect solution for me. I bought some inexpensive clipboards from the local store (I think these cost my $0.97 a piece) and used gel medium to adhere maps. I love maps and have them throughout my studio, so using maps was the perfect thing. Now I have a cute and organized way to see exactly what I'm working on and what's coming up.
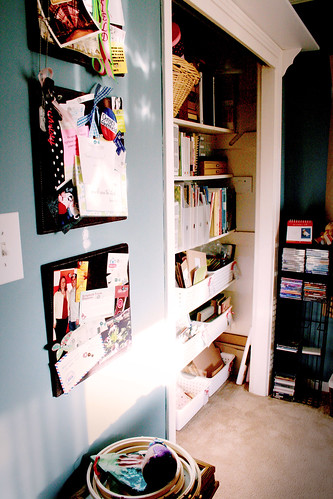
To the right of the door (left if you are walking in) is my inspiration boards and closet. The inspiration boards are chocolate brown corduroy bulletin boards I picked up on clearance at Target. Underneath the boards is a small table holding current craft projects.
I absolutely love the closet! The previous owners (actually two owners ago) added some extra shelves for their child's closet. We improved upon that and added one more to make five shelves. The shelves can easily be removed if we ever sell the house (we also kept the clothing rod). Originally the closet had sliding doors that made it very difficult to reach everything in the closet. So, I decided to remove the doors. I hated the closet before, but now I love it. Everything is accessible and in plain sight. I tend to use my supplies when I can see them. We saved the doors, of course. They're in the storage room. The closet holds my fabric, felt, gift bags and wrapping paper, office supplies, patterned paper, craft books, etsy items, chipboard, vintage books for mixed media projects, small embellishments, acrylic paints, canvases, and mini albums waiting to be transformed.
I absolutely love the closet! The previous owners (actually two owners ago) added some extra shelves for their child's closet. We improved upon that and added one more to make five shelves. The shelves can easily be removed if we ever sell the house (we also kept the clothing rod). Originally the closet had sliding doors that made it very difficult to reach everything in the closet. So, I decided to remove the doors. I hated the closet before, but now I love it. Everything is accessible and in plain sight. I tend to use my supplies when I can see them. We saved the doors, of course. They're in the storage room. The closet holds my fabric, felt, gift bags and wrapping paper, office supplies, patterned paper, craft books, etsy items, chipboard, vintage books for mixed media projects, small embellishments, acrylic paints, canvases, and mini albums waiting to be transformed.
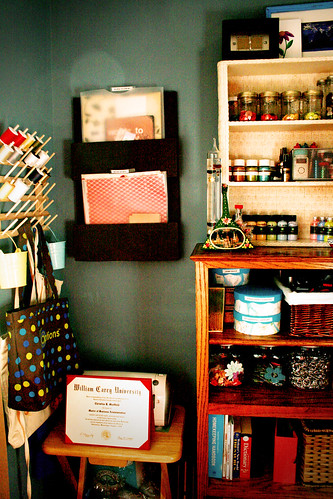
In the opposite corner of the room I have a bunch of my favorite things. My thread spools are on the wall, as well as a Pottery Barn organizer that I got on clearance for $15. I use that to house future projects. I have two more on the other side of the cabinet. I also ashamedly stuck my mba diploma on a folding dinner table that holds my cricut machine. I really couldn't think of anywhere to put it when I earned it, and it's kind of stuck there now. Collecting dust. Which is exactly what that degree is doing in real life since I'm not using it at the moment. :)
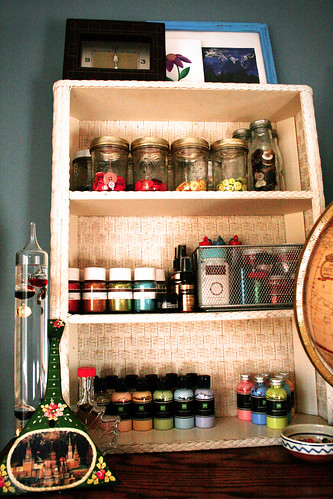
I'm extremely proud of this. I found this wicker shelf unit in my laundry room when I bought the house. I couldn't think of anything to do with it and was going to donate it. But then Making Memories came out with their embellishment storage center. Which I loved, but couldn't afford. A-ha! Lightbulb moment. So, I cleaned the shelves and stuck it on my cabinet. It now holds my lovely paints, glitters, and buttons.
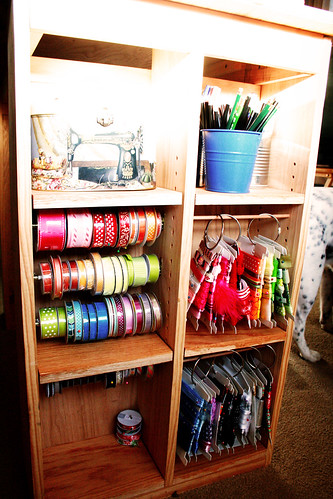
The side of my table houses all of my ribbons. One side (not pictured) has jars full of little ribbon bits sorted by color. That's the ribbon that is too short to go around ribbon cards, but long enough to use on small projects. This side has my ribbon spools and other ribbon. Longer bits of ribbon that isn't on a spool is wrapped around ribbon cards from Cropper Hopper. And, yes, they are sorted by color. The cards are stored on large binder rings hooked to dowel rods.
The ribbon spools was my most recent project. I tried storing the spools on dowel rods but found that if I made the rods long enough to fit in the pre-drilled holes, I ended up scraping the sides each time I took the rod off. Which I would have to do when I used up a ribbon or added more. Not a big deal now, but once the table is painted I would end up with a scrape. Not cool.
Fortunately I had bought some curtain rods a while back that I had been meaning to return to the store. Never got around to it, but that's okay because I found a way to use them here. Now, these rods hook onto metal plates that are screwed into the wall. So, they lay flat. That wasn't going to work for me, however, because I didn't want to screw the plate into the back of the desk. I wanted it on the sides. Because I'm thrifty, and pretty determined, I found a way to make it work. I simply got my pliers out and bent the piece that sticks out (that you put the rod on) out a little, so that I could still use the rod. That explanation probably makes no sense, so I'll try and post a tutorial on that. Anyway, to put it in simple terms - it worked and I now have a great storage space for ribbon spools.
This side also houses a basket for my sewing machine supplies (such as extra needles, cords) and my drawing supplies.
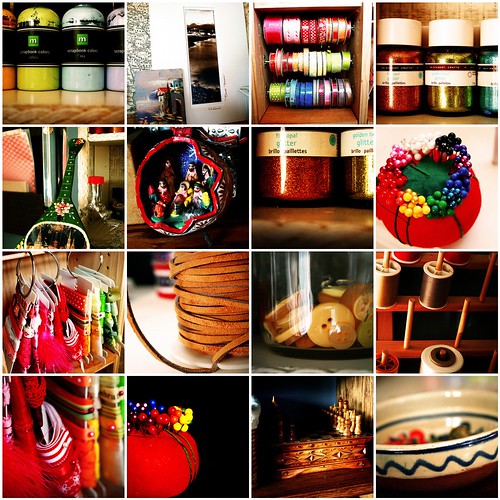
Here's more pics from around the studio:
1. Paint, 2. Art, 3. Ribbon-03, 4. Glitter-02, 5. Souvenier-03, 6. Souvenier, 7. Glitter, 8. Pincushion, 9. Ribbon-04, 10. Leather, 11. Buttons, 12. Thread, 13. Ribbon-02, 14. Pincushion-02, 15. ChessSet, 16. Souvenier-02
I am really impressed with how organized you have the craft room....now you can enjoy your spring break working on your craft projects.
ReplyDeleteLooks great!!!
ReplyDeleteThanks for the tour of your studio! I'm trying to get mine into shape, and I'm absorbing details from everybody's space. You have lots of wonderful storage ideas. Do share your curtain rod tutorial for ribbon spools. I have the project table from Pier 1 I'd like to be able to do that to.
ReplyDeletelooking at your site gives me inspiration and re-instills my faith in trying new things on my own... Keep it going... :)
ReplyDelete